 |
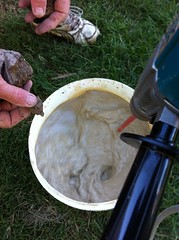
| Mixing Thumb-sized Chunks of Clay |
We again used the power drill and paint stirrer. We started with the 40-50 litre bucket, but broke it part-way through and swapped to a 20 litre bucket. The quantities below are for a 40-50 litre bucket unless specified otherwise.
The rough quantities for this batch were:
First Batch: (good)
1/3 bucket of lumpy freshly dug clay
1/3 full of water
 |
| Mixing in the Barrow |
Second Batch: (fail)
1/4 bucket of broken up clay
1/2 full of water
(This one was probably a fail. I broke up the clay first, then mixed for a shorter time using drill and paint stirrer. There was a lot of clay left in the bottom of the bucket when I poured it into the barrow - this was probably mostly water. We blame this batch for making this layer too wet.)
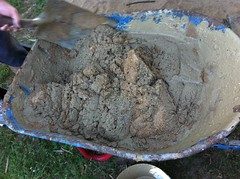 |
| More Mixing in the Barrow |
1/2 bucket of water
Lots of clay broken up and dropped in a piece at a time - probably more than half a 40-50 litre bucket of lumpy clay
(After the second batch it was obvious we needed to get this right as the barrow had very wet contents and only limited clay. Bob broke clay into thumb-sized pieces, as we did when we were puddling, and I continuously stirred with the drill and paint stirrer. I tested the clay content by inventing 'the glove method' by dipping my hand in and removing it and seeing how much clay coated it. With this batch the clay was one to two millimetres thick on my hand and very viscous.)
This were put in the barrow with ultimately about half a barrow of sand - this was added gradually to thicken the mix.
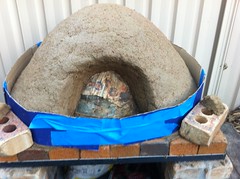 |
| Pizza Oven Bandaged Up |
Like the wet sand at the beach, our mix wanted to 'slump' down on the steep sides of the oven, but sat well on the top. Bob came up with a solution to the slumping - adding a cardboard 'bandage' around the entire girth of the oven. This did a good job of holding the clay up while it dried.
...Geoff the Sand Castle Builder
No comments:
Post a Comment