Showing posts with label mixing with drill. Show all posts

Tuesday, May 3, 2011

8. Mix & Lay 3rd Layer

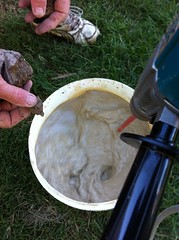
Mixing Thumb-sized Chunks of Clay
After the second batch we were pretty enthusiastic about doing the final batch.  I think we got a bit cocky, and as a result we went with a much too liquid-y mix for this layer - but more of that later.

We again used the power drill and paint stirrer.  We started with the 40-50 litre bucket, but broke it part-way through and swapped to a 20 litre bucket.  The quantities below are for a 40-50 litre bucket unless specified otherwise.

The rough quantities for this batch were:

First Batch: (good)
1/3 bucket of lumpy freshly dug clay
1/3 full of water
Mixing in the Barrow
(Used the same approach as the previous batch - just mixing for a long time using the drill and paint stirrer.)

Second Batch: (fail)
1/4 bucket of broken up clay
1/2 full of water
(This one was probably a fail.  I broke up the clay first, then mixed for a shorter time using drill and paint stirrer.  There was a lot of clay left in the bottom of the bucket when I poured it into the barrow - this was probably mostly water.  We blame this batch for making this layer too wet.) 
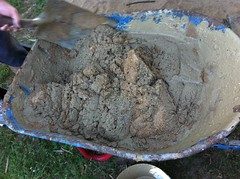
More Mixing in the Barrow
Third Batch: (excellent)
1/2 bucket of water
Lots of clay broken up and dropped in a piece at a time - probably more than half a 40-50 litre bucket of lumpy clay
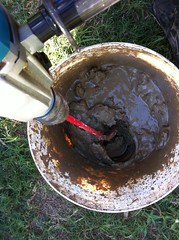
(After the second batch it was obvious we needed to get this right as the barrow had very wet contents and only limited clay.  Bob broke clay into thumb-sized pieces, as we did when we were puddling, and I continuously stirred with the drill and paint stirrer.  I tested the clay content by inventing 'the glove method' by dipping my hand in and removing it and seeing how much clay coated it.  With this batch the clay was one to two millimetres thick on my hand and very viscous.)

This were put in the barrow with ultimately about half a barrow of sand - this was added gradually to thicken the mix.
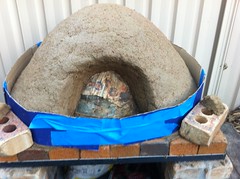
Pizza Oven Bandaged Up
This mix failed the drop test.  The result smushed and broke apart on impact.  By now we were over this part of the project, and we pressed on with the overly-wet mix.  If you have built a castle at the beach in the zone where waves are regularly inundating the base of your castle you will be familiar with the saturated sand you put onto the castle.  It resists shaping and tends to slide down the edges of the castle.  This is what we worked with. (Although I might have exaggerated a little.)

Like the wet sand at the beach, our mix wanted to 'slump' down on the steep sides of the oven, but sat well on the top. Bob came up with a solution to the slumping - adding a cardboard 'bandage' around the entire girth of the oven.  This did a good job of holding the clay up while it dried.

...Geoff the Sand Castle Builder

Sunday, May 1, 2011

7. Mix & Lay 2nd Layer

Materials Used to Mix  2nd & 3rd Layers
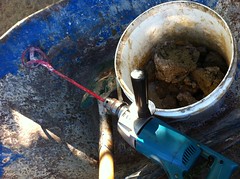
I had asked Bob to bring a steel paint mixer that he already owned on the day we worked on the first layer.  I was pretty committed to the puddling method at that time, so put it aside.  Having done my time twisting for that previous layer, I was ready to see whether our workflow could be improved. So we ran an experiment...

First Stage of Mixing Underway
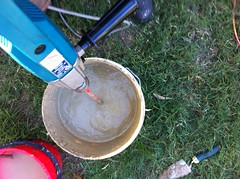
Bob had brought the steel mixer and a powerful hand-held electric drill (Makita 6300-4).  I used these on about a third of a deep bucket of clay and water.  It was fantastic.  Not only did it mix, but it involved minimal effort.  It took some time, but not nearly as long as the puddling method, and without the dancing.

I added some more clay and water, and once I had about 3/4s of a bucket I poured (yes, poured) it over some sand in the wheel barrow.  The sand mixed in with the clay-ey liquid like mixing mortar.  I did some more and invited Bob around to assist in finishing the batch and putting it on as the second layer.
First Stage of Mixing Almost Complete

I used a 40 or 50 litre bucket.  The rough quantities for this layer were:

First Batch:

1/2 bucket of lumpy freshly dug clay
1/4 full of water
about 2 spades of sand (in the barrow)

Second Batch:
full bucket of lumpy clay
2/3 full of water
Second Stage of Mixing
about 4 spades of sand (in the barrow)

Mixing in the barrow, the first batch was probably a little too dry; and the second batch may have been a little too wet.

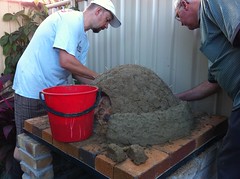
Overall, this layer was a bit wetter than the previous one.  It would have been difficult to form bricks.  Instead we applied this layer by making snowballs and going around in circles.  It was strong enough to allow me to add some extra clay mix as a slight cowling over the doorway.

Adding the Second Layer
...Geoff the Technology User

Second Layer Complete